Great Story on a Jaguar XKE E-type Restoration : Steering Wheel Refinishing
 One of the first things I wanted to tackle on the XKE was the wood steering wheel. The Series II cars have the same beautiful mahogany rims and lovely growler center piece as the Series I cars. The aluminum spokes are NOT polished and shiny like the Series I cars, but have a flatter brushed metal finish. One important tip – the center of the steering wheel is not a horn button. On Series II cars the horn is activated though an arm from the steering column. So, avoid banging away on that center to get the horn working… I wanted to refinish the steering wheel first because it is easy and fun to do, and because my wheel had some long cracks in the grain of the wood rim that made it a bit bendable. I did not want small cracks to become bigger problems.
The first thing to do is to remove the steering wheel from the car. This is easier than for most cars because it does not require a wheel puller. Now – here is an important warning that I received before I started – DO NOT START BY TRYING TO PRY OFF THE CENTER EMBLEM. If you do this you will only break an expensive emblem. Instead, look behind the spokes on the wheel (between the spokes and dash) and you will find three counter-sunk screws that hold the center emblem. Back-off these three screws and the emblem will be free to pull out of the center. Once you have the emblem free you just need to undo the large 1″ diameter nut that holds the wheel to the splined shaft of the steering column. Once the nut and washers are off gently rock the wheel free of the column – presto!
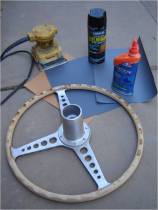
I used the gentle application of a small screwdriver and some wood skewers to open up the wood cracks in the rim of the wheel and then fill them with glue. I used Elmers Probond (c) wood glue. I then used clamps (protecting the wood with a layer of cloth) to hold the cracks tightly closed while the glue dried for 24 hours. I used four clamps all around the wheel. I did the glue work first so that any residue would be removed during the subsequent sanding.

Jaguar XKE ( E-type) Steering Wheel Removal

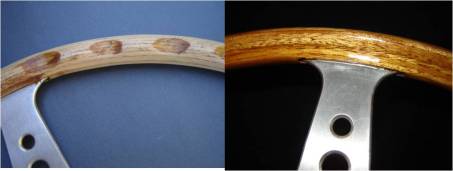
The Wheel Finish During Sanding and After Varnish
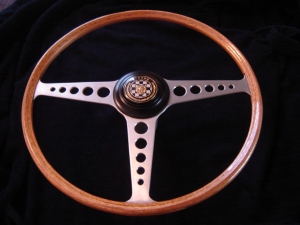
The final product of all this is a wheel that is solid again – and to my eye looks just great!

The Finished Jaguar XKE ( E-type) Steering Wheel
source: http://jaguarxke.wordpress.com/2009/04/16/xke-steering-wheel-refinishing/
No comments:
Post a Comment