Friday, November 30, 2012

Auto Upholstery Bay Area - How to Get Creases Out of a Leather Car Seat - Cooks Upholstery and Classic Restoration

Getting creases out of leather car seat upholstery is a simple do-it-yourself project. Learn how to smooth out and repair leather car seats.

Leather Car Seat

A leather car seat needs special care and attention. It can develop creases over time. Here's how to get rid of creases in a leather car seat, as well as a few tips to help you take better care of your seats.
Removing Leather Creases
Turn on an iron to the coolest possible setting. Let it run for a bit and make sure that it's not giving out any water or steam. Lay the paper bag flat on the crease in your car seat, covering as much of the crease as possible. Iron over the paper bag to press out the crease. Make sure that you move the iron a lot to prevent it from burning the leather. Repeat the process for each crease on the seat.
Extra Care for Your Leather Car Seat
Consider the following when caring for your leather:
  • Excessive exposure to direct sunlight will damage your leather car seat. Your seats will likely get exposed to a lot of sun every time your car is parked outdoors. The best solution is to place a sun shade on your windshield to keep your leather car seat in the shade no matter where you park
  • Excessive heat will damage car seat leather just as much as sunlight. If you live in cold climate, this might not be much of an issue, and leather generally does better in colder regions. However, even moderate outside temperatures can cause the interior of a car to heat up to 100 degrees or more if parked in the sun with the windows closed. Opening your windows just a crack when you have to park in the sun will help keep the car's interior at less damaging temperatures
  • Never wipe your leather seats down with paper towels or something similar. Anything that's made of paper, no matter how fine it is, will leave scratches in leather. Use cotton towels instead. Better yet, rip up some old t-shirts and use them as leather car seat rags. Some auto supply stores even sell fragments of t-shirts for use as leather-friendly cloths
  • Make it a habit to periodically wipe your leather car seats down with leather conditioner. Leather conditioner can be found in most auto supply stores. Apply generous amounts of conditioner to a cotton cloth and spread it evenly and liberally over your car seats. If it's been done properly, a wet film should be left behind on the leather, which will gradually soak in


Thursday, November 29, 2012

Auto Upholstery Bay Area - How to Soften a Stiff Leather Car Seat - Cooks Upholstery and Clasic Restoration


Leather Car Seat Detail

A leather car seat can enhance value and beauty to a car. With proper care, they can last into vintage age. It's important not to get leather soiled, soaked, or let it dry out, but if you have leather car seats that have become stiff, there are some remedies.
Remove the leather seats from any area that is extremely hot or cold, or excessively dry or humid. You may want to remove them from the vehicle to begin restoring the leather. Before you place anything on the leather, think of it as your own skin. Chemicals and heat can harm or crack it. Improper cleaning can also remove finishes and colors.
You'll need to wash the leather to clean the dirt deep in the pores and to remove any stains before applying conditioner. Conditioner will soak in deeply and will drag the dirt in as well, if not removed first. Be sure to use quality products, as some leather cleaners can actually damage leather. Avoid leather care products that are alkaline by nature. These products can further dry and eventually crack the leather. Also avoid petroleum distillates, silicones and waxes that are fire hazards. Some cleaners leave a residue or darken and harden the leather.
A good leather wash will safely clean and lift out embedded dirt. It should have beneficial lubricants to soften the leather. Cleaners that don't need to be rinsed out and are removed by wiping straight off are best. Also, a cleaner that will enhance the original leather color without changing it is preferred. Always try to work on a sample first, or in an area that is not seen in order to learn what the results will be.
When fully dry, use a quality leather restorer/conditioner to gently massage the stiffened leather. A pH-neutral product is recommended. Apply the conditioner with a sponge or soft cloth (never use paper, it will cause scratching). Leather absorbs just what it needs. The conditioner should soak in, and then disappear. You should not need to wipe it off. If you apply too much, it will stay wet or greasy. A good conditioner will penetrate deeply to the center of the leather to nourish and lubricate its fibers. A pH neutral conditioner will not interfere with the natural acidic quality of the leather. Instead it will increase its softness and life in general.
Cleaning, restoring and conditioning should be repeated every three months to keep the leather strong and supple. It is important to replace oils that are lost, or the leather will eventually dry out and begin to crack. You may wish to add a protective shield or water repellent to provide protection from the elements, or from spills.
Keep your car in a dry location, out of extreme temperatures of heat or freezing cold. On warm days, crack the windows. Even if it's only 70 degrees outside, it could easily heat up to 100 degrees inside. Use shades on the windows to keep the sun from beating down on the leather seats which will eventually fade and crack the leather.
 

Wednesday, November 28, 2012

Auto Upholstery Bay Area - How Often Should You Clean and Condition Leather Seats? - Cooks Upholstery and Classic Restoration


There are a lot of opinions about how often you should condition leather seats. There is not really a correct answer to this question. It can vary depending on the exposure to the sun, how many people typically ride in the car, or if there are pets and kids in the vehicle. A good rule of thumb is every three months. If the car is frequently used or spends lots of time in the sun, every two months may be a better timetable. On the other hand, if the vehicle is used gently on an irregular basis, cleaning and conditioning every six months should be sufficient.

source: http://www.carsdirect.com/car-maintenance/how-often-should-you-clean-and-condition-leather-seats

http://www.cooksupholstery.com

Friday, November 23, 2012

Auto Upholstery Bay Area - Cleaning Milk Spillages and Eliminating Stale Odors - Cooks Upholstery & Classic Restoration


Cleaning Milk Spillages and Eliminating Stale Odors

0
If you have ever accidentally spilled milk or other dairy products in your car then you will probably know that the spillage will soon begin to give off a stale odour that can prove to be very difficult to remove. The reason these spillages quickly begin to smell is because of living bacteria that is found in milk & dairy products. Ideally, the affected area needs to be cleaned and as much of the spillage removed as soon as possible after it has occurred to prevent it from spreading and sinking deeply into the surface, but obviously this is not always possible due to the nature of the accident.
Milk Spillage
The key to successfully cleaning up a milk or dairy spillage and preventing any stale odours from emerging is to ensure that you use a specific biological upholstery cleaning product. This is essential as biological cleaners contain active enzymes that will kill the living bacteria in the spillage therefore preventing, or eliminating any odours from emerging. You can use a normal non biological upholstery cleaning product to clean the area and whilst it may initially seem to do a satisfactory job as soon as the cleaning product residue dries the stale odour will reemerge as the bacteria causing the odour will have not been killed by the normal cleaner.
If you do not have access to a biological cleaner right away you can to use a normal upholstery cleaning product to remove and clean up as much of the spillage as possible until you can follow up with a biological cleaner to kill the bacteria. Ideally the cleaning process should be undertaken with a wet-vac extraction machine as this ensures that the cleaning product penetrates deep into the fibres of the upholstery and that all fluid is thoroughly extracted.
However not everyone has, or can gain access to an extraction machine so in this case the process needs to be undertaken by hand. Cleaning the affected area by hand may take a little more time, but if done correctly you should still be able to achieve satisfactory results.
 
As much of the spillage as possible should first be mopped and soaked up with micro fibre towels. Then a biological upholstery cleaning product should be applied liberally via a trigger spray to ensure sufficient penetration. It can be left to soak for a few minutes before being worked in. Depending on the type of upholstery affected, a micro fibre towel, a stiff bristled detailing/nail brush or a combination of the two should be used to thoroughly work the cleaner in and help lift out the spillage residue.
After working the cleaner in, the area should be thoroughly patted and rubbed over with a clean micro fibre towel. The towel should be rinsed & wrung out in warm water before repeating the process. You should continue to dry the area until the towel does not lift out any more residue. Ideally a vacuum cleaner should then be used on the area to further ensure that as much moisture as possible is removed.
During the cleaning process you should open all the doors of the vehicle to aerate it. After the spillage has been thoroughly cleaned and aerated you can apply an air freshening product, close the car up and allow to dry.
Depending on your climate and how damp the cleaned area remains, you can speed up the drying process by leaving the windows open an inch or by leaving the vehicles hot blowers on with the engine running. You should wait until the affected area is completely dry and then recheck for odours. The process may need to be repeated in order to successfully remove all of the bacteria as it can penetrate deep down into the fibres of the upholstery.


Wednesday, November 21, 2012

Auto Upholstery Bay Area - How to Repair Rips in Leather Interior - Cooks Upholstery & Classic Restoration Redwood City


Rips on the leather interior of a car can make a new car look like an old junker overnight, and left unattended these small tears can soon become massive in size and severity. While the normal response to a rip on a leather interior would be to immediately take the vehicle to a repair shop, the costs associated with leather repair can be outrageous and to be quite frank everyone simply cannot afford the repairs. In these instances the options are limited - you can either repair the rips in the leather interior yourself or learn to live with them. It is easy to understand that many drivers are frightened by the prospect of initiating their own leather repairs, but in actuality many can be performed very quickly and without excessive expense or hassle.
To repair rips in a leather interior that are minor (under 3 to 4 inches) the availability of leather repair kits sold at auto parts stores have become quite popular and useful. These leather repair kits are usually priced at under $30 and contain everything that is needed to make a competent and attractive repair by yourself. Whether the rips in the leather interior are located on the seats, dashboard, or doors these kits can usually make a nice repair in under an hour. The basic premise is to mix the color and activator that comes in the kit and apply it to where the leather is torn. Next, a textured grain paper is placed over the repair area and a heat tool that is included in the repair kit is pressed onto the paper. When the paper is removed, the repair is complete with a close match in color and texture of the original leather.
To repair large rips in interior leather seats there are three possible ways to go. One is to attempt to sew the tear together using a needle and heavy thread, but this can be tough due to the thickness of the leather. Another option is to carefully cut out the leather seat panel, and then purchase a replacement piece and sew it into position. Lastly, the entire leather seat cover can be removed and then sewn on a sewing machine. While this can make for the most neat looking repair to a leather seat it often requires removing the entire seat from the vehicle in order to remove the leather cover from the seat itself.
In any instance to repair rips in a leather interior it becomes important to weigh your options carefully before acting. When it comes to leather repair, often the path of least resistance provides the most appropriate avenue of enacting a sound repair.

Tuesday, November 20, 2012

Auto Upholstery Bay Area - Rebuilding the first Duesenberg, one bolt at a time - Cooks Upholstery and Classic Restoration Redwood City


On a recent fall morning, business is buzzing at the automotive candy shop that is Canepa Design. Over here, a Ferrari Daytona is having work done on its carbs, over there a vintage Mercedes Benz Gullwing is being stripped of paint. But sandwiched between other familiar sports cars -- a pair of Porsche 356s and a Shelby GT350 -- is a rare bird of a far different feather: The first passenger car to ever wear the name Duesenberg, an important piece of automotive history.

Dave Stoltz, Canepa's one-man restoration crew on this project of a lifetime, is hard at work on this doozy of a car, a 1921 Duesenberg Model A road-rocket that has been in the Castle family -- Hawaiian missionaries turned land and produce magnates -- since new and is being revived by California descendent Jimmy Castle. The car is the first production model of the storied racing-focused brand that later became synonymous with four-wheeled opulence. These visions of American luxury were driven by everyone from Al Capone to William Randolph Hearst, and custom-outfitted cost as much as $25,000 at a time when doctors earned around $3,000 a year.

Canepa Design's mission is to present this one-off car at the 2013 Pebble Beach Concours d'Elegance, just down Highway One from its Scotts Valley, Calif., headquarters. Although in its present state the car looks humble, restored it could well make a 1962 Ferrari GTO that recently traded hands for $35 million look like a cheap date.
"It's like a Honus Wagner baseball card," says Jay Leno
"Duesenbergs routinely fetch eight figures, so for this one, the very first production car that's stayed in the same family, the price could well be more than $50 million," says Canepa spokesman John Ficarra, who adds that the restoration alone will cost more than a million, most of it in labor as Stoltz sets about either restoring or manufacturing myriad pieces using as a roadmap just four photos of the car in its heyday.
Not that the car's ultimate asking price matters. Castle doesn't appear to be selling. Duesenberg collector and comedian Jay Leno tried to buy the car a few years back but was politely rebuffed. He remains intrigued by the seminal machine.

"The Duesenberg brothers built racing cars, which eventually gave way to making a few production cars," Leno explains. "This car had a straight 8 (cylinder) engine, which was fairly new at the time, and hydraulic brakes. It was big, heavy and reliable. The first of anything is always significant. It's like a Honus Wagner baseball card. And some cars these days really are moving into the realm of kinetic artwork, investments that aren't unlike buying an early (Marc) Chagall or a Picasso."

What makes this car unique is that despite its massive size it was, relatively speaking, a spry coupe in its day, says Randy Ema, one of the nation's foremost Duesenberg experts who owns what's left of the manufacturer's records and blueprints and has provided some assistance on the restoration.
"The car could hit 80 mph and rev up to 4,000 rpm, which was really unheard of back then," says Ema. "It was a light, nimble little car when compared to a Packard or Lincoln. It also cost $9,000 when a Ford cost around $280. But what makes this model so special is it's the first and only remaining original-owner car."
While this particular Duesenberg isn't accompanied by much documentation save vintage photos, "Fred Roe's book on Duesenberg indicates that it was built and sold before the end of 1921 and that the original owner's assertion that it was the first car sold is probably correct," says Jon Bill, archivist at the Auburn Cord Automobile Museum in Auburn, Ind. (Auburn Automobiles owner E.L. Cord bought Duesenberg in 1926.)
Dave Stoltz, the Duesy's lone restorer, works on a brass headlight
The first thing that strikes you about the car is the size of its two-passenger cabin, which is framed in wood. The oversized dimensions stem from its first owner's massive size, said to be some seven feet tall and three hundred pounds. But changing that seat position is likely the only thing Stoltz will mess with on this car; his mandate is to spare no expense to make the car look like it did the day it left the Duesenberg factory.
"Not long after the first owner bought the car he shipped it to Hawaii, where the lava roads and farm life were very taxing," says Stoltz. "So he eventually shipped it back to the factory, and they beefed things up a lot, all of which we are getting rid of. I now have these four (original) photos ingrained in my head, and I've been making new parts as we go along."


This rebuild is as complete as they come. Time and the ocean's salt air ate away a good deal of the car's aluminum and steel, and the deterioration was exacerbated by decades of storage in Hawaii and California. So far, Stoltz has hand-fabricated bumpers, parts of fenders, an intricate luggage rack, a brass gas cap, and headlight stands - a part you can barely see once the British-made brass headlamps take up residence on top of them. Stoltz pulls off the stands, two pieces of flowing sculpture that he says could be made using computer technology for around $7,000 but which he crafted from molds for $5,000.

"Besides the cheaper price, I liked the fact that they wouldn't be totally perfect, because no one back in 1921 was using computers to make anything," snickers the pony-tailed Stoltz, whose recently helped restore a 1959 Ferrari Testarossa to its former glory. "This is definitely a dream job for me. This Duesy is like a ghost car, because no one has seen it for years. But in the end a car's a car. If you're willing to put in the hours researching, scouring the Web looking for parts, making parts, starting from scratch when you have to, then anything is possible."

At present, the body of this 1921 Duesenberg is waiting to be joined by its suspension and engine, the latter being worked on by fabled Ed Pink Racing Engines in Los Angeles. We'll be back with more as the car comes together.

source: Motoramic
by Marco R. della Cava

Friday, November 16, 2012

Auto Upholstery Bay Area - How to Pick the Right Restoration Shop - Cooks Upholstery and Classic Restoration


How to Pick the Right Restoration Shop

Take these professionals' advice and learn what to look for


How to Pick the Right Restoration Shop


Let's face it-not all of us have the tools, skills and space to restore a muscle car by ourselves. Where does this leave us? There are hundreds of restoration professionals out there who can tackle even the rustiest hulk of a formerly glorious car. Before you can choose a restoration shop, you've got to decide what you want the finished car to be (Concours-winning show car, or simply a nice driver?) and how much money you can spend to get it to that point.

When you finally own a restoration-worthy car, you'll have to determine if you can perform any aspects of the rebuild yourself, or if you'll have to farm out the entire project to specialists. If you reason that restoration is out of your league, the next step becomes the homework you'll have to do in order to pick a restoration shop that will deliver the finished product you envision while remaining close to your budget and time schedule.

Talk to other people at car shows, pick a car like the one you want to restore, or one that appeals to you. Talk with the owner about the restoration, and find out if any other cars at the show were done by the same restorer." You may learn of shops that specialize in GMs, Fords, Mopars or AMCs, but they aren't automatically your best choice-the best will be restorers who do the most careful and thorough work.

You'll have to do a fair amount of research; call a variety of shops and speak with the owner or principal restoration specialist. Talk with them about your vision of the completed car, and ask them what they have to offer. A good shop manager will be more than happy to discuss his experience and restoration techniques, and will do the same for any of his employees. It's also important to learn if the shop stores all cars being worked on indoors, and if they carry enough insurance to cover all vehicles in the shop.

As you visit prospective restoration shops, you should pay attention to the appearance of the facilities and the equipment with which it is furnished. If you've got a car that will require extensive metal fabrication, look to see if they have a metal brake, an English wheel, a shrinker/stretcher and a bead roller, among other important metalworking tools. They should also have a blast cabinet, a lathe, and a half-ton press as well as gas and MIG welding equipment. Organization and adequate space are also important in a shop.

"When you're working on a car, it's often hard to keep the work space clean, but it's important that there is room to work on a car and good access to the parts and equipment that will be needed," says Joe Myers of Myers Classic and Custom in Palmer, Massachusetts.

The reputation of a shop is extremely important, as is the satisfaction of its former customers. Stop in the local parts store and ask the guys how (the restoration shop is). They'll always tell you-they never pay on time, or, they're great guys who do good work." Contacting old customers is also a smart bet. A restoration shop should be willing to give you the phone numbers of previous clients, You should talk to those clients about what was done to their cars, and look at (the work) if possible.

You will sometimes come across shops that advertise both collision work and auto restoration. While most restoration professionals focus solely on restoration work, some shops combine it with collision repair. Some restorers caution against using a combination shop, arguing that collision expertise isn't restoration expertise and that prompt work and attention to detail can suffer. Tom Kazanji, owner of Redz Auto Collision and Restorations in White Plains, New York, has been restoring cars for years and disagrees. "I don't do that much collision work anymore; there are a lot of guys here who handle it," he says, explaining that his Shark laser measuring machine forms a de facto line of demarcation between the everyday insurance work and the restoration work he handles personally.

When you feel comfortable with a shop, it's important to discuss all the particulars of the costs that occur during a restoration. Tom says that his labor rate is $65 an hour, but explains, "I job-cost every single project that comes through here, because the materials are exorbitant. You're talking $2,000 to $3,000 per car just for paint, primer and painting supplies. I have a 1970-1/2 Z/28 in here now that's going to cost $10,000 just to paint. You have to understand, these are projects that can take four to five months to finish. It's not like Mrs. Smith, whose Honda Accord gets smacked up and it's gone from here in three days."

When you've chosen your restoration shop, get a written estimate for the labor, materials and parts required for the project, but remember that estimates are subject to change. "It's difficult to figure an exact price on any restoration," Gary says. "I'll have a general idea of what it will cost, but even my best guesses are often low. You've got to be prepared to spend more money," Tom adds, depending on the situation, a car's restoration may end up costing many times its value. A shop that specializes in your car may change a flat rate, with a clause for extra charges due to unforeseen additional work, while a general restorer may charge for labor, materials and parts separately. A deposit is often required to secure services and begin the parts ordering process.

Be aware that better restoration shops will often have substantial waiting lists, ranging from months to years.
Once a restoration begins, most good restorers want to remain in touch with the car's owner to allow progress updates as well as to keep abreast of potential financial issues. If the shop you've chosen isn't within reasonable driving distance, be sure to ask for detailed photographs on a regular basis. Who knows-maybe your car will become the next HMM restoration profile feature!

Feature Article from Hemmings Muscle Machines

May, 2006 - Mark J. McCourt


Thursday, November 15, 2012

Auto Upholstery Bay Area - Four Reasons NOT to Restore a Vintage Car - Cooks Upholstery and Classic Restoration Redwood City


By: J.P. VETTRAINO

Les Jackson is no ordinary guy. He restores old cars for fun.
Jackson and Satch Reed maintain a website called Second Chance Garage (www.secondchancegarage.com). Their description of the site as “a bible of restoration—how-to, auto theory, community” is generally accurate. As you wade through its pages, you’ll find most of what you need to know if you’re thinking about a restoration.
Jackson offers an Intro to Auto Restoration course in a community ed program, but at the start of each term, he rarely gets a quorum, as there’s less interest than there used to be.
“I’m concerned that restoration is a fading art or a fading hobby,” he says. “Maybe 95 percent of us have the potential to learn the process and be pretty good at it. The hard part is finding the motivation, commitment and patience. It’s a labor of love, and that’s all. If someone has to work to convince themselves, they probably shouldn’t do it.”
If you’re cut from Jackson’s cloth, have at it. But first, consider four reasons you should not restore a car.


1. YOU WILL NOT MAKE MONEY


Everyone has thought when they see a project for cheap: “Hey, I’ll snag this car, spend more time than money fixing it and then, after enjoying it, sell it at a tidy profit.”
Fat chance. Whichever restoration type you try, the overwhelming odds are that the car and the job will end up costing more than they’re worth. Yes, people have made big money through this process—but it’s almost always those you’ve paid to do the work. The car’s value simply will not support the cost of both the car and the rebuild.
Jackson does everything himself—down to stitching seats—and says he has made money on his restorations. With 17 cars to his credit, he’s both proficient and efficient. By his own calculation, for the tens of thousands of hours he’s invested, he’s returned about $3 per. In other words, he’d earn more part-time serving fries with that order.
It only gets worse from there. If you act as general contractor, the most expensive subcontracted jobs will be paint and then an engine rebuild. For decent quality work, those two jobs alone will cost more than a clean, decently restored MGB. And no one will pay top dollar for a car unless it’s a top-notch, fresh restoration. A full professional job is likely the least cost-effective proposition: Think 1000 hours at $70 or so, or $70,000. And that’s just for the labor.
Unless the car was owned by someone famous, has a documented history, or is exceptionally rare and expensive, it will cost more to restore than it’s worth.


2. YOU’LL SPEND MORE THAN PLANNED


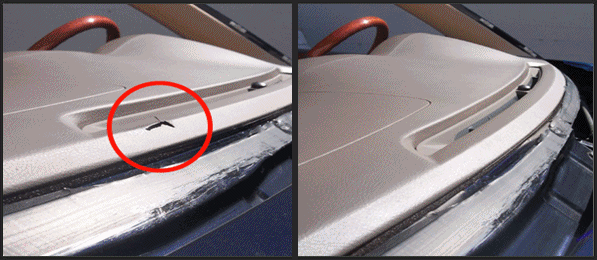
We’ve never met an enthusiast who restored a car and didn’t overspend the budget. Ever. Even if you’ve set aside enormous mounds of cash, you’ll buy things you never accounted for. And then the price of brake kits or weatherstripping or gaskets will go up. You’ll buy things twice. If you’re taking the car apart and putting it back together, you’ll buy tools you never knew existed—and use them once. Your restorer, even if he’s a seasoned pro and not a flake, will find something he hadn’t anticipated. If you’re not satisfied with the work, you might switch shops mid-process, and that will cost. In all cases, as the restoration moves toward completion, and you shake your head in resignation at the original budget, you’ll be in the difficult position of having to skimp where you never expected you would. Or not, and spend large.


3. YOU PROBABLY WON’T FINISH


How do we count the ways? If Jackson flies through a modest, straightforward job, he will invest 1000 hours. He recommends a baseline projection of 2000 hours and much more for first-timers. Do the math: 2000 hours equals two hours and 45 minutes every day for two years. No, you get no holidays or days off.
Better to consider the old-car habit from another perspective: If it’s driven more than twice a year, an already-restored or decent original car will offer enough tuning and tinkering opportunities to satisfy those who want to work with their hands.
“Restorations take so much time no matter how you do them, and they’re tedious,” says vintage-car expert Keith Martin, publisher of Sports Car Market. “There are never any pleasant surprises.”


4. PROTECTING AN HEIRLOOM ISN’T WORTH THE AGGRAVATION, EITHER


You’ve inherited an uncle’s ’65 Mustang coupe with the 129-hp, 200-cid straight-six. This money pit is deeper still, because the cost/value equation tips further out of whack. Done properly, restoring that six-cylinder ’Stang will cost almost as much as redoing a GT 350. In number terms, think about $100,000 in a car that on a good day might get $25,000.
Is that “original is better” philosophy taking hold here? Not as it has in Europe, but it is gaining traction. A car is only original once. Spend what it takes to keep that heirloom running, and make your first $10 million before committing to more and undertaking the whole project.


BUT IF YOU INSIST . . .


Remember the Internet is a wonderful resource. Information and experts—or fools—are keystrokes away. A search will reveal regional car owners clubs, and sources such as www.secondchancegarage.com are essential. Perhaps more significant, used-car parts are easy to find on the web. Depending on your restoration needs, replica, rebuilt or original parts with next-day shipment are available without ever talking to a human. It was not long ago that parts were scavenged in swap meets around the country. That has all changed.
“The satisfaction is similar to restoring or rebuilding a house, with some added benefits,” says Jackson. “There can be more of a community aspect to restoring a car, and when you stop for gas, people ogle and marvel. ‘You did that?’ You can’t drive a house to the gas station.”
source: http://www.autoweek.com/article/20070515/free/70514008

http://www.cooksupholstery.com


Wednesday, November 14, 2012

Auto Upholstery Redwood City - Jay Leno Restores a Vintage Mercedes-Benz 300SL Gullwing - Cooks Upholstery and Classic Restoration Redwood City


photo by John Lamm

For Jay Leno, the Mercedes-Benz 300SL Gullwing was always just out of reach. That changed recently when he bought, and slowly restored, a 1955 300SL. Though its paint job isn't new, this sturdy Gullwing is finally back on the road.


Since I’m one of the few guys on TV who own old cars and enjoy restoring them, people often contact me about their car projects. Some are restorations that folks may have barely started. Others are vehicles they’ve labored over, but never quite finished. Then there are the cars that people have owned for 40 years, and now they ask me if I’d like to buy them so they end up in a good home. 

That’s how I came to own a 1955 Mercedes-Benz 300SL Gullwing. It was an old race car that its owners put in a storage container out in the California desert in the late 1970s. And the Mercedes just sat there for decades. I’m only the third owner. And that makes it special. 

The 300SL was ahead of its time, with a tubular space frame, fully independent suspension, a fuel-injected SOHC Six, those cool gullwing doors and a lot of racing history. John Fitch won the GT Class in the 1955 Mille Miglia, and finished fifth overall in what was basically a stock 300SL. But for me, it was always a car that was just out of reach. When I was in college in 1969, working for a Mercedes-Benz dealer, we took one in trade. We gave the guy $5500 for it, which seemed like a lot of money back then. Within 10 days, we’d sold it for $7200. We thought we’d pulled off quite a con job ... we got 7200 bucks for that thing. 

We’re restoring the mechanicals and the instruments on my Gullwing, but we’ll leave the worn interior and exterior alone. I like not having to worry about a freshly sprayed, pristine paint job. It’s very liberating if a screwdriver falls on the fender and makes a mark. You don’t go, “Aaarrrggghhh! The first chip!” 

At some point, we will restore it completely. But there’s something charming about having a car that’s used for its original purpose—driving. I’ll just tool around in this coupe for a while, and when enough purists get angry at me, we’ll restore it. But right now, I can take it to Bob’s Big Boy and if somebody wants to lean on it, I won’t get upset. I don’t want to be one of those guys who says “Hey! Hey! Heyyy!” 

So far, we’ve redone the transmission, the brakes and the motor. We broke in the engine correctly—on the dynamometer. There’s a diaphragm in the Bosch fuel-injection system that was originally made of some kind of lambskin. The original one was faulty, and the engine was running way too lean over the 3500 to 4000 rpm range. But we have a new one in now, and it’s running much better. If we had installed the engine in the car without the dyno test, we would have probably melted a piston, and the engine would have been destroyed. But luckily, we caught the problem. 

These 3-liter Sixes were supposed to develop 220 to 240 hp. We cleaned it up internally, did a little work to it, and we’re seeing around 180 hp. I was disappointed, but I talked to a few Mercedes guys, and they said that was about right. It’s like the Jaguar XKE—Jag claimed 265 hp, but it was probably more like 210 hp. Back then, everybody lied about horsepower. 

The 300SL has beautiful finned brake drums, but a chunk of one drum was missing. We could have made a new one with our CNC machine, but instead we called the Mercedes-Benz Classic Center, which has parts for just about every car the company made. They’re not inexpensive, but try to find one anywhere else. It’s brand-new, and it’s made by Mercedes-Benz. Every Gullwing part is available from the Classic Center. 

Honda used to do that. When Soichiro Honda, the company’s founder, was alive, he vowed that every part for every Honda motorcycle would always be available. But once he died, they brought in the accountants who said it wasn’t viable to keep Honda 50 leg shields in stock. Yet Mercedes-Benz has always produced those parts, and that makes people bond with the brand. 

They built just 1402 300SL Gullwing coupes, but it was enough to support the spare-parts market. If you write a book on the Gullwing, you’ll always sell at least 1400 of them. If you write a book on, say, the Jackson car, made in Michigan until 1923, you’ll sell five. There might be five Jacksons left out there. 

My vintage 300SL Gullwing will be finished at about the same time the new SLS AMG Gullwing hits the road. And the old ones still cost more than those brand-new ones. I think that’s funny, but I do like to see the heritage carried on. The Gullwing works because there’s a bit of theater involved. The car requires some effort: You can’t just get in and drive it. There are certain things you have to know about, whether it’s as simple as the flip-down steering wheel or the heater controls. You sort of pilot these cars; you don’t necessarily drive them. You have to understand the handling limitations of those swing axles too—in high-speed corners they can be a handful. Consequently, you tend to drive a bit more carefully. 

I’m not one of those people who have to have the ultimate 300SL with the knockoff Rudge wheels either. That’s just extra cake frosting. I think the regular hubcaps and steel wheels look a little nicer. The knockoffs can loosen and come off, and I don’t want to drill them and put safety wire on them. With lug nuts, I know what I’m doing. It’s like women who wear those high heels. “Yes, but they’re really attractive,” they’ll say. And I think to myself, “But they’re uncomfortable!” 

The Gullwing isn’t our only Mercedes project. I bought a 6.3-liter 600 sedan from the 1960s with 324,000 miles on it—my favorite Mercedes from a styling and performance point of view. I thought, why don’t we install the modern 6.3-liter V8? So we’re putting in a new AMG 563-hp V8, like the one in the SLS, with a seven-­speed transmission. We’ll turn it into the ultimate 6.3 Mercedes-Benz. Stay tuned.

source: http://www.popularmechanics.com/cars/jay-leno/vintage/4346495
by Jay Leno

http://www.cooksupholstery.com