Friday, June 28, 2013

Auto Upholstery Redwood City - How to Soften a Stiff Leather Car Seat - Cooks Restoration Redwood City (650) 364-0923

Stiff leather car seats left in the heat can become brittle and crack over time. Fortunately, softening a stiff leather car seat is easy to do.

Leather Car Seat Detail


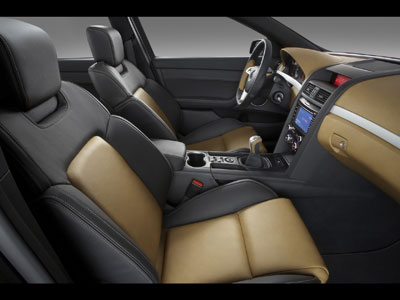
A leather car seat can enhance value and beauty to a car. With proper care, they can last into vintage age. It's important not to get leather soiled, soaked, or let it dry out, but if you have leather car seats that have become stiff, there are some remedies.
Remove the leather seats from any area that is extremely hot or cold, or excessively dry or humid. You may want to remove them from the vehicle to begin restoring the leather. Before you place anything on the leather, think of it as your own skin. Chemicals and heat can harm or crack it. Improper cleaning can also remove finishes and colors.
You'll need to wash the leather to clean the dirt deep in the pores and to remove any stains before applying conditioner. Conditioner will soak in deeply and will drag the dirt in as well, if not removed first. Be sure to use quality products, as some leather cleaners can actually damage leather. Avoid leather care products that are alkaline by nature. These products can further dry and eventually crack the leather. Also avoid petroleum distillates, silicones and waxes that are fire hazards. Some cleaners leave a residue or darken and harden the leather.
A good leather wash will safely clean and lift out embedded dirt. It should have beneficial lubricants to soften the leather. Cleaners that don't need to be rinsed out and are removed by wiping straight off are best. Also, a cleaner that will enhance the original leather color without changing it is preferred. Always try to work on a sample first, or in an area that is not seen in order to learn what the results will be.
When fully dry, use a quality leather restorer/conditioner to gently massage the stiffened leather. A pH-neutral product is recommended. Apply the conditioner with a sponge or soft cloth (never use paper, it will cause scratching). Leather absorbs just what it needs. The conditioner should soak in, and then disappear. You should not need to wipe it off. If you apply too much, it will stay wet or greasy. A good conditioner will penetrate deeply to the center of the leather to nourish and lubricate its fibers. A pH neutral conditioner will not interfere with the natural acidic quality of the leather. Instead it will increase its softness and life in general.
Cleaning, restoring and conditioning should be repeated every three months to keep the leather strong and supple. It is important to replace oils that are lost, or the leather will eventually dry out and begin to crack. You may wish to add a protective shield or water repellent to provide protection from the elements, or from spills.
Keep your car in a dry location, out of extreme temperatures of heat or freezing cold. On warm days, crack the windows. Even if it's only 70 degrees outside, it could easily heat up to 100 degrees inside. Use shades on the windows to keep the sun from beating down on the leather seats which will eventually fade and crack the leather.


Thursday, June 27, 2013

Auto Upholstery Redwood City - Leather Seat Restoration - Cooks Restoration Redwood City (650) 364-0923

Professional leather restoration can make old tired leather look new

This leather seat is obviously in dire need of some restoration. This is the typical result of years of hot sun and little or no care.
You can see by the photo that the leather is in terrible condition. Aside from the three cut through the leather the rest of the seat is surface damage. That means the leather is still intact it merely has damage to the factory finish.
After a few hours a leather restoration expert can make even this old tired seat look new.

Before Photo of Seat

Photo of the seat before it was restored
After the restoration

Cleaning the leather before restoring it.

This seat is really dirty, obviously.
So the first step in the restoration process is to clean the leather.
First you want to use a diluted multi purpose cleaner and a soft plastic scrub brush and scrub the entire surface of the leather seat. Pay special attention to the seams, holding them open while scrubbing out the dirt.
Use a clean shop towel to remove the dirt. Keep cleaning the leather with the multi purpose cleaner until there is not dirt on the towels when wiping.
Second, you want to remove any oils and waxes from products like Armour All. To do this I use acetone on a cloth and quickly wipe down the surface. Make sure you get into the seams as well. Some of the color might come out of the leather with this cleaning but it is ok since the entire surface is being redone anyway.
Allow to air dry or use a common hair dryer to accelerate the process.

Repairing the rips

Patches
Patches
Holding the repair flat

Repairing the rips in the leather

There are three rips that need to be patched before the rest of the surface can be restored.
I am going to use thin strips of swede to make sub patches. This will hold the leather together and allow the surface to be filled.
Cut the swede about twice the size of the rip and round off all the corners. Insert the patch into the rip and adjust the position so the leather lines up properly. The leather glue I use bond very quickly. I have about 4 seconds to apply it and get the leather in the right spot.
Use a flat block to hold the leather flat while the glue bonds.


FIlling the surface cracks.

The right side is completely filled. This is a demo so it will show "before - during - after"

Restoring the leathers surface

With the rips repaired it is time to fill the entire surface of the leather seat with leather filler. Leather filler is a compound used to fill the cracks and wrinkles that develop in the leather as it ages. The leather filler remains pliable and bonds solidly to leather. 
Filling the leather is much like applying drywall mud, just on a far smaller scale. I use a small oil painting trowel and apply thin layers of leather filler, starting on the edge of the seat furthest from me and work towards myself.
It is important to get the filler as smooth and uniform as you can. It will be lightly sanded at the end but the smoother you can apply it the better.
This seat took four separate layers of leather filler before I was pleased with the surface being ready for the next step.
Once the filler is completely dry it can be lightly sanded with 320 grit sandpaper. Be rather gentle to avoid damaging the surface.

Finishing the Leather Restoration

The final stage is to add some grain to the finish and restore the color.
Adding Grain
Adding Grain

Finishing the leather restoration

With all the cracks and rips filled and sanded the surface is ready to be finished. This means restoring the original color and adding some grain to the surface to mimic the surface of leather. The filler makes a completely smooth surface and that is not how the original surface was.
Using an airbrush and a colored leather dye the surface grain can be re-created and the look of the finished color coat will be so close to the original finish it will be undetectable by anyone.
Restoring the finish requires many coats of grain allowing each to dry before applying the next coat. After many coats the surface will start to look more like real leather.
A final dusting of dye will complete the color restoration and the last stage will be to add a protective coat. This will also control the shine of the finished leather and add a UV protectant so the surface can withstand the conditions.


source:

Wednesday, June 26, 2013

Auto Upholstery Redwood City - Removing Ink from your Cars Leather Seats - Cooks Restoration Redwood City (650) 364-0923


Ink is a dye. Your leather has literally been re-colored to the color of that ink in the affected area. As such, it is not something that can be "cleaned", as any cleaning compound that is strong enough to remove the ink, will also remove the surface color of the leather. Ink sticks are available from various sources. However, we urge caution, as there are generally two outcomes.

The ink is removed along with the surrounding color, leaving a larger, "bleached" area.

The ink is smeared, leaving a larger smudge mark.

There are some things you can try. Using a soft, white artist's eraser, gently trail down the ink line with the eraser. This may lighten the ink stripe. Another strategy is to do nothing. One of ink's attributes is that it migrates into porous materials. If there is a small amount of ink, it may dissipate into the leather, presenting a decreasing amount on the surface, and may eventually fade away entirely. This is unlikely with any heavy concentration of ink.

Keep in mind that the ink isn't harming the leather, and is an aesthetic issue only. In the end, the ink can be removed successfully, but may require professional attention.

source: http://advleather.com/faq.html#ink

http://www.cooksupholstery.com

Monday, June 24, 2013

Auto Upholstery Redwood City - How to Get Creases Out of a Leather Car Seat - Cooks Restoration Redwood City (650) 364-0923

Leather Car Seat


leather car seat needs special care and attention. It can develop creases over time. Here's how to get rid of creases in a leather car seat, as well as a few tips to help you take better care of your seats.
Removing Leather Creases
Turn on an iron to the coolest possible setting. Let it run for a bit and make sure that it's not giving out any water or steam. Lay the paper bag flat on the crease in your car seat, covering as much of the crease as possible. Iron over the paper bag to press out the crease. Make sure that you move the iron a lot to prevent it from burning the leather. Repeat the process for each crease on the seat.
Extra Care for Your Leather Car Seat
Consider the following when caring for your leather:
  • Excessive exposure to direct sunlight will damage your leather car seat. Your seats will likely get exposed to a lot of sun every time your car is parked outdoors. The best solution is to place a sun shade on your windshield to keep your leather car seat in the shade no matter where you park
  • Excessive heat will damage car seat leather just as much as sunlight. If you live in cold climate, this might not be much of an issue, and leather generally does better in colder regions. However, even moderate outside temperatures can cause the interior of a car to heat up to 100 degrees or more if parked in the sun with the windows closed. Opening your windows just a crack when you have to park in the sun will help keep the car's interior at less damaging temperatures
  • Never wipe your leather seats down with paper towels or something similar. Anything that's made of paper, no matter how fine it is, will leave scratches in leather. Use cotton towels instead. Better yet, rip up some old t-shirts and use them as leather car seat rags. Some auto supply stores even sell fragments of t-shirts for use as leather-friendly cloths
  • Make it a habit to periodically wipe your leather car seats down with leather conditioner. Leather conditioner can be found in most auto supply stores. Apply generous amounts of conditioner to a cotton cloth and spread it evenly and liberally over your car seats. If it's been done properly, a wet film should be left behind on the leather, which will gradually soak in
 

Friday, June 21, 2013

Auto Upholstery Redwood City - How to Repair a Torn Leather Car Seat - Cooks Restoration Redwood City (650) 364-0923


Car leather repair doesn't have to be taxing and can be carried out by most novices. Leather is one of the most attractive interiors that you can have in a car, so keeping it in good condition is paramount. Small or large tears can be repaired in a short space of time using a simple procedure.

Tools and Materials:

  • Nail scissors
  • Warm water or rubbing alcohol
  • Small pieces of cloth
  • Some cotton wool
  • Replacement leather
  • Adhesive glue
  • A small piece of sandpaper
  • Dye (your choice of color)
  • Leather conditioner

Step 1: Tidy the Tear

Tidy up the current tear in the leather car seat. Use a pair of scissors to cut away any rough areas or edges on the tear. Use nail scissors if there are only a few strands of material sticking out from the tear. This will make the repair easier and will leave the leather looking more attractive afterward. It will also let you reach beneath the tear with your fingers without the risk of making it worse.

Step 2: Clean the Tear

Use some warm water and a cloth or some cotton wool and rubbing alcohol to thoroughly clean the tear. Make sure you clean the surrounding area of the tear both above and beneath it. This should stop the replacement leather from becoming dirty in a short space of time. It should also stop the current leather from losing color around the edges of the tear.

Step 3: Cut Replacement

Cut out a replacement piece of leather. Either buy this leather to match the interior of your car or use a leather repair kit. Make sure you cut an excess of about one inch, as this will entirely cover the current tear in the leather. The excess will allow for a margin of error and will soak up the dye so it doesn't seep into the original color and spoil the interior of the car.

Step 4: Smooth and Sand

Apply some strong adhesive around the edges of the tear in the seat. Place the replacement leather over the top. Allow a few hours for the adhesive to dry and then sand around the edges to remove any excess glue and rough edges. This will reduce friction when you have to apply different agents in later stages.

Step 5: Color the Leather

Use a small amount of dye to color the replacement leather so it matches the rest of the car. You can buy dye specifically for this job or use one in an auto seat leather repair kit. Use a small cloth to evenly apply the dye over the patch and a sponge to gently rub away any excess dye and color. If you get the color wrong, it will be obvious where you have done your handiwork.

Step 6: Condition the Seat

You need to condition the repair to make it look better and seal all of the work done so far. Apply some leather conditioner over the patch and a small cloth to even it out. This will give the repair work a glossy finish. It will look like a unique leather design as opposed to a repair, once the conditioner has dried.


Auto Upholstery Redwood City - Three Types of Leather Car Seat Covers - Cooks Restoration Redwood City (650) 364-0923


Leather seat covers in a car are a great way to cover up cloth covered seats that are wearing out or have holes in them. Car leather seats are sought after because they add a sense of richness and class to the vehicle's interior. There are many different kinds of car leather seat and covers, so no matter what impression you want the inside of your car to give off, there is a type of leather seat cover for you. The following is a list of some of the most popular types of leather car seat covers.

NuBuck

NuBuck is a type of leather that closely resembles suede. It is kind of fuzzy and feels a little soft, not slick like most types of leather. Of all types of leather commonly used to make leather car seat covers, NuBuck is the easiest to scratch and stain, so it may not be the best for you unless you regularly practice interior car maintenance.

Top Coated/Protected

The most common type of leather for car seat covers, Top Coated leather is much more smooth and uniform in appearance than NuBuck. It does not display the natural leather markings you would expect on leather because it is coated with a seal for protection. Top Coated leather makes up about 90% of the leather used in cars or on furniture.

Imitation

If you don't want to pay for real leather, you can get plastic seat covers that are made to look like leather. The plastic is textured to appear like leather but it is actually much more durable. Imitation leather can also come in many different colors to match your car's exterior.


Thursday, June 20, 2013

Eliminate Lower Back Pain Automotive Orthopedic Seat Sculpting Bay Area - Cooks Upholstery and Classic Restoration (650) 364-0923


Do you experience lower back paid while driving?  Our team of experts here at Cooks Upholstery can re-sculpt your car seat to fit your back and significantly reduce your lower back pain while driving.

Research shows that it is a lot easier to get comfortable in your seat when the car is stationary, a bit like sitting in a normal chair. But once you start driving the body will be subject to various forces like accelerations and decelerations, lateral movements from side to side and whole body vibrations.  When we sit on a chair our feet rest on the floor and are used to supporting and stabilizing the lower body.  While driving our abdominal muscles can not provide enough stability to our upper body and arms when turning the wheel.  This will result in a significant increase of torsional stresses in the lower back, which in return will significantly increase the risk of low back pain.

Our team of experts can re-sculpt your car seat to fit you back and significantly reduce your lower back pain while driving.

http://www.cooksupholstery.com

Wednesday, June 19, 2013

Auto Upholstery Redwood City - Interior Restoration of a 1938 Lincoln Zepher - Cooks Restoration Redwood City (650) 364-0923


The 1938 Lincoln Zephyr’s low and horizontal mustache grille may not look very revolutionary to most of us today, but it played a key role in triggering one of the most significant and lasting design transformations, not unlike the 1959 GM cars and the 1960 Corvair. GM Styling Head Harley Earl was quoted as saying: “Oh my God, how did we miss on that one? That’s going to ruin us”. Ironically, the new grille was not the result of stylistic creativity for its own sake, but the very pragmatic solution to a technical problem.


The 1936 and 1937 Lincoln Zephyrs had a very handsome front end, designed by Gregoire to make the radical rear-engined Zephyr concept by Tom Tjaarda look more conventional, along with its front engine. Gregoire gave it the pointed upside-down boat-hull prow that he knew Edsel Ford favored. And as a result, the Zephyr avoided the controversial looks of that first American streamlining attempt, the Chrysler Airflow.


Cooks is doing a complete interior bringing it back to it's original condition.  The biggest challenge is getting the right interior which requires going through many samples and working with many sources such as the Lincoln Zepher Club, specific original cars and the Academy of Arts.

This will be a fun project and we know it will turn out spectacular.

http://www.cooksupholstery.com

Tuesday, June 18, 2013

Auto Upholstery Redwood City - How to Re-dye Leather Car Seats - Cooks Restoration Redwood City (650) 364-0923


Re-dying leather car seats will give the interior of your car a new lease on life. Not only will it make worn seats look like they have come straight out of the showroom, but re-dying leather car seats will help make the old and stiff leather feel soft and supple. Whilst re-dying car seats is not that complicated, it can be a lengthy process as it needs to be done in two stages so plan accordingly and allow yourself plenty of time to complete the process.

You Will Need:

  • Cheesecloth Polishing Cloth
  • Terrycloth Towel
  • Leather Surface Prep Solution
  • Leather Dye
  • Acrylic Brush (optional)
  • Vinyl Gloves
  • Damp Cloth

Step 1 - Prepare the Leather Surface

Ensure the surface is clean before starting. Cleaning car leather is a vital part of ensuring the remainder of the task can be completed correctly. Pour the fresh lacquer thinner onto a clean terrycloth shop towel and rub into the leather car seats in circular movements. This will remove the old car leather dye. Apply more of the lacquer thinner until the whole of the seat is covered. Always work on one seat at a time. Leave the seats to dry for several hours and then clean down with a damp cloth.

Step 2 - Apply the Dye

Put on the vinyl gloves to avoid dyeing your hands and put a small amount, usually around 10 drops, of the leather dye onto a dry cloth. Be sure to blot the cloth with another cloth to avoid too much dye being applied. Concentrate on a single section at a time and gently rub the dye into the leather car seat, once again using a circular motion to ensure the dye is being worked into the leather.
Pay particular attention to the seams and piping to make sure the dye is covered evenly. The dye can also be applied with an acrylic brush although using a cloth gives greater control over the dye. Use the cloth to rub the dye all over the leather car seat. Work with small amounts at a time to avoid applying the dye too thickly. If part of the surface is blemished, apply a heavier overall coverage. Once you are happy you have an even coat which has covered the whole of the leather car seat, leave for approximately 2 hours.

Step 3 - Apply a Second Coat

If the leather car seats look too light in color, applying a second coat of dye will darken it. A second coat can also help cover any blemishes like streaks or areas with darker grain. Make sure the seats are completely dry before applying further coats. Alternatively, if the opposite problem has occurred and, by applying too much leather dye your seats look too dark, use surface prep liquid to remove some dye from the surface of your leather car seats.   

Step 4 - Let the Dye Set and Buff Up

The final step is to allow the dye to set into the leather car seats and polish them. Avoid touching the seats for 48 hours. Once they are completely dry, take a cheesecloth polishing cloth, which are available from hardware and auto parts stores, and hand buff the leather seats until you are happy with the finish. The more 'elbow grease' you use when buffing, the shinier your leather car seats will become. Apply pressure accordingly until you achieve your desired finish.


Saturday, June 15, 2013

Auto Upholstery Bay Area - 1961 Cadillac Eldorado Biarritz Convertible Interior - Cooks Upholstery Redwood City


We have done a complete new interior and top boot on this unique Cadillac Eldorado Biarritz Convertible.  This is a very unique Ostrich interior.  Their was a lot of hand crafting that was incorporated into the Biarritz.  This interior has all hand rolled pleats.


The 1961 Cadillac Series 62 Eldorado Biarritz Convertible was priced at $6,500 with 1,450 examples produced. Powering the car was an overhead valve V-8 engine that displaced 390 cubic-inches and produced 325 horsepower. It had power vent windows, six-way power bench seat and even a remote control trunk lock. 

The styling for 1961 was updated, with a new grille that leaned back towards both the top of the hood and the bumpers. The wraparound windshield found on the 1960 models were replaced with non-wraparound glass. In the back, the familiar tailfins could still be found. The rear tail-lamps were vertical in 1960, and horizontal for 1961.

By Daniel Vaughan

http://www.cooksupholstery.com

Friday, June 14, 2013

Auto Upholstery Bay Area - 10 auto upholstery care tips - Cooks Upholstery Redwood City


Your car’s upholstery probably takes more wear and tear than you realize: Soiled shoes, spilled drinks, kids and pets can quickly turn your car’s interior into a mess. Follow these 10 upholstery cleaning tips to help eradicate the mess:
1. Deal with spilled drinks immediately
It’s not always easy to do, especially if you’re traveling on the highway or in heavy traffic, but the quicker you clean up spills such as coffee, juice or cola, the less likely you’ll have a stain set in your seat fabric or carpet. Fist, dilute the spill cool water (never use hot water, it can set the stain). Then, blot the excess liquid up with a clean rag or paper towel.
2. Use glass cleaner for difficult stains
Some difficult stains that remain even after you clean them can sometimes be broken up with glass cleaner. Before using glass cleaner to remove a stain, test it in an inconspicuous area to make sure it won’t stain the fabric or carpet itself. Then saturate the area with glass cleaner, let it sit for five minutes, then blot to clean.
3. Attack ink stains with hairspray
If you somehow get ink on your car’s interior fabric or carpet, spray the area with hairspray. Let it sit for a few minutes until it absorbs the stain, then wipe it off. Repeat as needed.
4. Don’t let bloodstains set
If blood comes in contact with your vehicle’s upholstery, do not clean it with hot water, which can set the stain. Make a paste with cold water and powdered laundry detergent. Apply to the stain until the stain dries, then use a brush or vacuum to remove it. Clean up any excess laundry detergent to avoid attracting more stains or dirt to the area.
5. Clean vinyl the right way
In general, vinyl upholstery can be cleaned with a damp rag and baking soda. Rinse this mixture off with water and dish soap. Avoid using any oil- or mineral-based cleaners, which can make vinyl stiff.
6. Give carpet a deep clean
The key to cleaning interior carpet and fabric upholstery is to get deep into the fibers. Using one gallon of hot water, mix one cup of vinegar and some dish soap, then use a hard bristle brush to work into the fibers. Let this sit for about 30 minutes before rinsing with water and blotting it dry with rags.
7. Dry leather thoroughly
Leather upholstery is quite sensitive to water, but water is necessary to clean it. Use a cloth with water and a low-pH soap to clean it, then dry thoroughly afterwards.
8. Use ammonia to brighten fading carpet
If your car's non-wool carpeting is fading, vacuum it thoroughly. Then, use a mixture of half a cup of ammonia and one pint of water to mop the carpeting. Do not use ammonia if the carpeting is made of wool.
9. Remove fabric indentations with an iron
Heavy objects left in the cargo hold or other areas of the car interior can sometimes leave indentations. To fix this, cover the marks with a damp towel, then use an iron set on a low setting and gently iron the towel. Do not use a hot iron and do not leave the iron in one spot for too long, as this can melt the carpet fibers.
10. Know when to call in the pros
If you prefer to save your elbow grease or when you try these various strategies don’t work effectively, it may be time to call in Cooks Upholstery rather than continuing to attack the stain with your own methods and risk damage to the upholstery.
 
by Nicole Harms
 

Thursday, June 13, 2013

Auto Upholstery Bay Area - Top 10 Tips for Classic Car Restoration - Cooks Upholstery & Classic Restoration


While this is a very exciting activity a car owner must know how to properly evaluate the condition of a car and then establish the level of restoration to be performed to such vehicle. There are 4 levels of classic car restoration, each one should be applied individually depending on the kind of project, budget and purpose. These are the top 10 tips for those classic car aficionados who want to reverse the effects of 'the sands of time' on their vehicles:

1. Sit down, grab a piece of paper, a parts catalog which would be relevant to the model you want to restore and run some numbers within your budget. Never deviate from it, otherwise the results will be obvious.

2. Inspect your car very carefully, top to bottom, inside and out; use strong flashlights to inspect the trunk, the engine area, etc. This will help you see the kind of repairs needed to be done to this vehicle. If possible take it to a car shop where it could be lifted to take a good look at the condition from beneath. Here you will determine if a the restoration process is worth the time and money.

3. After inspecting the vehicle, it is also important to decide whether you have a 'solid' car which can be restored without replacing the entire frame, floor, axles, etc. It would amaze you how this step can save you major dollars. By 'solid car' we are inferring that the car structure should be strong, as well as the floor; a little rust can be repaired but a completely rusty car which has the entire frame compromised will eventually crumble.

4. Decide whether you want to work with a "friend who knows how to repair cars" or a professional. It is often recommended not to involve friends and family on such projects as the time and money invested on this process may cause some trouble if the right procedures are not followed. Cars restored by people other than professionals tend to run well for a couple of years and in some cases start to breakdown thereafter.

5. Have a car restoration professional run some numbers and make sure they match or are close to the numbers you ran on step 1.

6. Decide the level of car restoration:

* Driver restoration: is often performed to get a car back to a fully functional and operational condition, they often include part replacement and minor cosmetic adjustments.

* Street Show: this restoration level involves getting a car into a fully working condition and repairing all major cosmetic problems (body work is required). If judged by a professional it should fall within the 80-89 point range.

* Show Car: restoring a classic car back to this form often requires professional work, if judged by a professional, there restorations and labor quality will fall within the 90-95 point range.

* Concours: this is the highest level of car restoration possible. All the work should be done by professionals, from part replacement to body work. These type of cars are intended for auto shows or private collections and not to be driven. Obviously, the original car to be repaired must be in quite optimal condition to achieve this stage, otherwise a major investment is necessary.

7. Start the restoration process, if possible follow a 2 step procedure (part replacement and chassis adjustments). Visit the car shop as often as possible to make sure the right work is being done. If this is not possible then have your mechanic send you periodical picture updates through email.

8. After the part replacement process is done, visit the shop again to re-inspect the chassis repairs needed, if sheet metal patches are necessary then remember to document the places where they are to be applied.

9. When all major restorations are done run a close and detailed inspection just like it was done during the second step to make sure everything is OK. Take it for a ride and see if it works correctly.

10. Remember to give proper maintenance to your newly restored classic using all the recommended parts and products.

The trick to getting newly restored cars to last for a long time lies within the last step, if the vehicle is properly maintained, in time, it will become a valuable asset and a sure head turner.
 
source: http://www.streetdirectory.com/travel_guide/159800/cars/top_10_tips_for_classic_car_restoration.html
 
http://www.cooksupholstery.com
 

Saturday, June 8, 2013

Auto Upholstery Repair and Replacement Bay Area - How to Get Rid of Insects in My Car - Cooks Upholstery Redwood City


While insects in the home are bad enough, they rarely pose a danger to human life; however, the ill-timed ant bite, hornet sting or roach on the leg at 60 mph could be disastrous. Getting rid of ants in the pants or roaches in the glove compartment isn't just easy -- it's kind of fun, and can come with a bonus: especially when you forgo all of those nasty chemicals and bug bombs and kill every living thing in your car -- and garage -- using one simple, cheap form of atmospheric modification.

Items you will need

  • Soup pot with handle
  • Tongs
  • Duct tape
  • Garage
  • Three 5-pound blocks dry ice
  • Step ladders
  • Three 5-gallon buckets
  • Warm water
  • Candle and holder
 
Step 1
Park your car in the garage, and close the garage door. If you have a remote for the garage door, take it from the car and keep it with you. Hunt down air leaks in your garage around the doors and windows. Chip a small chunk of dry ice off of your block, and drop it into a soup pot full of warm water; wait for the dry ice to start producing CO2 fog, and wave it near your garage doors and windows; watch the fog for movement, and note the places where air movement through the leaks around your windows and doors disturbs the CO2 fog. Seal those leaks by whatever means necessary, as well as you can. Duct tape, old shirts and rags, even foam sealant around the windows will all help to seal the garage.
Step 2
Place your three large buckets evenly around your garage, and as high as possible. You might even consider placing them atop step ladders. If you're only using two buckets, place them at either end of the garage; if you're using four buckets, then place them at the corners. Fill each halfway with warm or hot water. Open your car's doors, trunk and hood, and stage your blocks of dry ice near the buckets. Place a candle into a candle-holder, set it on top of your car's roof, and light the candle.
Step 3
Carefully lower the dry ice blocks into the buckets using the appropriate tools or gloves; don't touch it with your bare hands under any circumstances. Work quickly -- get all three buckets filled with dry ice blocks and billowing fog as quickly as you can, or have one assistant for each bucket and drop the blocks simultaneously. Get out of the garage ASAP; it will quickly fill with carbon dioxide.
Step 4
Watch the magic through a window and keep an eye on that lit candle. The cold carbon dioxide gas is heavier than air; as the garage fills with CO2 from the ground up, it will eventually reach that candle and extinguish it. Once the flame goes out, you know that your car is covered with enough CO2 gas to kill anything trapped inside of it or below the car's roof-line in your garage. This should happen in a matter of minutes for the average two-car garage, but the dry ice will continue bubbling away and filling the room with CO2 for at least another 20 to 30 minutes. Soon, there will be so much fog you won't see the car.
Step 5
Sit back and wait. All animals need oxygen to survive, and the heavy CO2 gas displaces the oxygen that the bugs in your garage need. Bugs don't require a great deal of oxygen, so they can go without for far longer than humans can; ants can survive in a pure CO2 environment for several minutes with no long-term side effects. This CO2-stunning procedure has been used for decades to study insects in laboratories. However, you'll want to leave your garage for at least an hour, to make sure that everything is dead. If you sealed it well, you may still have some visible fog even that long afterward.
Step 6
Open your garage door using a remote garage door opener, if applicable. If you do not have a garage door opener, wait for the fog to clear out prior to entering the garage.
by Richard Rowe, Demand Media