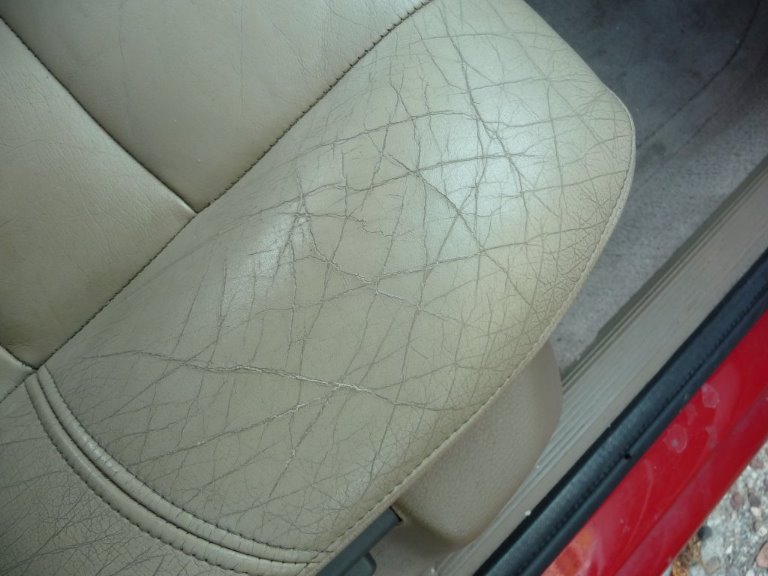
After a decade of wear and tear, the leather finish sometimes crack and wears off. Replacing a leather interior for an old car is prohibitively expensive, usually running in the several thousands of dollars. Sometimes the car isn’t even worth that much! So what’s a guy to do?
I’ve read about various leather treatments and have tried most of them. There’s no saving dry, hard, cracked leather if you ask me. However, if your leather is still pliable, but there are cracks in the surface finish, there is hope. I came across a company called Leather Magic on the web. After reading lots about them and also viewing their YouTube video, I thought I would give it a try. This is my experience in pictures.
The color of my car interior was “Light Beige” so I ordered the color with the same name on their color page for Volvos. So far so good.
So I decided to try this on my front passenger seat first. Since it needs to sit for 48 hours after the repair, I figured I could still drive the car if I needed to. Here’s what I had to deal with.
So the first order of business was to clean it well. I used a light detergent (same as I use when I wash my car) and a nylon scrub brush. I must say that I was surprised how much dirt was removed by this simple process.
The photo above shows, the repair compound being scraped into the cracks. Between each coat I had to sand it lightly and get rid of the dust. After about 4 passes (it took a long time), the surface felt pretty smooth. OK, it’s time to color it.
It was getting dark as I had worked at this for about 3 hours now. I took the last picture with a flash and noticed that the color of the new area and the old area was not really matching so well. It looks like I’ll have to re-color the whole seat for a perfect match. However, look at the repair area! It looks like it’s new leather!
I showed this to my family when then came home, and they thought I had replaced the leather! So at the end of the day, here’ s my analysis.
- It works pretty darn well.
- It takes a long time…. 3 hours for the part I did.
- The color match was pretty good, but in certain light, you can see a difference. Plan on coloring the whole seat.
by song
www.cooksuphols


Where to buy this amazing product and other Car Care Products online in India?
ReplyDeleteIf you're looking for top-notch auto upholstery services in the Bay Area, Cooks Upholstery & Classic Restoration offers expert automotive leather repair that can make your car interior look brand new. While you're getting your upholstery restored, don’t forget to keep your car looking pristine on the outside. A good glass cleaner, like Glass Cleaner Spray, is essential for a streak-free finish on your car’s windows, ensuring your restored upholstery is complemented by a spotless exterior.
ReplyDelete